

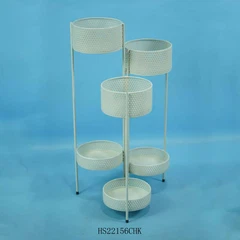
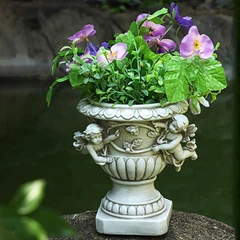
Drilling drainage holes in a metal flower pot is a crucial step to ensure the health of your plants. As a supplier of high - quality metal flower pots, I understand the importance of proper drainage and the safety concerns associated with the drilling process. In this blog, I will guide you through the steps to drill drainage holes in a metal flower pot safely.
Why Drainage Holes are Essential
Before delving into the drilling process, let's understand why drainage holes are so important. Plants need a well - balanced environment, and excess water can lead to root rot, which is a common cause of plant death. Drainage holes allow water to escape from the pot, preventing waterlogging and ensuring that the roots have access to oxygen. Without proper drainage, the soil in the pot can become compacted, and the plant's growth can be severely stunted.
Tools and Materials You'll Need
- Drill: A power drill is the most efficient tool for this task. Make sure it has variable speed settings, as you'll need to adjust the speed depending on the thickness of the metal.
- Drill Bits: For metal, you'll need high - speed steel (HSS) drill bits. The size of the drill bit depends on the size of the pot and the type of plants you'll be growing. A 1/4 - inch or 3/8 - inch drill bit is a good starting point.
- Safety Gear: Safety should always be your top priority. Wear safety glasses to protect your eyes from metal shavings, gloves to protect your hands, and ear protection if the drill is noisy.
- Measuring Tools: A ruler or a measuring tape will help you mark the spots where you want to drill the holes accurately.
- Clamps: To keep the pot steady during drilling, use clamps to secure it to a workbench or a stable surface.
- Lubricant: A lubricant such as cutting oil can help reduce friction and heat during drilling, which can extend the life of your drill bit and make the drilling process smoother.
Preparing the Metal Flower Pot
- Choose the Right Pot: At our store, we offer a wide range of metal flower pots, including the White Metal Flower Pot, Large Gold Indoor Plant Pot, and Gold Hanging Plant Pot. Select a pot that suits your plant's needs and your aesthetic preferences.
- Clean the Pot: Before drilling, clean the pot thoroughly to remove any dirt, dust, or debris. This will prevent the drill bit from getting clogged and ensure a clean cut.
- Mark the Holes: Use a measuring tool to mark the spots where you want to drill the holes. For most pots, it's a good idea to drill holes evenly spaced around the bottom of the pot. Make sure the holes are not too close to the edge of the pot, as this can weaken the structure.
Drilling the Holes
- Secure the Pot: Use clamps to secure the pot to a stable surface. This will prevent the pot from moving during drilling, which can lead to uneven holes or even injury.
- Lubricate the Drill Bit: Apply a small amount of cutting oil to the tip of the drill bit. This will reduce friction and heat, making the drilling process easier and extending the life of the drill bit.
- Set the Drill Speed: Start with a low speed setting on your drill. As you start drilling, you can gradually increase the speed if needed. A slower speed is better for the initial penetration, especially for thicker metal.
- Drill the Holes: Place the tip of the drill bit on the marked spot and apply gentle pressure. Let the drill do the work, and avoid forcing it. If the drill bit starts to bind or overheat, stop and apply more lubricant. Drill through the metal until the bit comes out the other side.
- Clean the Holes: After drilling each hole, use a wire brush or a file to remove any burrs or sharp edges. This will prevent damage to the plant's roots and make it easier to insert drainage materials.
Post - Drilling Care
- Rinse the Pot: Once you've finished drilling all the holes, rinse the pot thoroughly with water to remove any metal shavings or lubricant.
- Test the Drainage: Fill the pot with water and check the drainage. The water should flow out of the holes freely. If the drainage is slow, you may need to enlarge the holes or drill additional ones.
- Prepare for Planting: Add a layer of gravel or broken pottery to the bottom of the pot to improve drainage. Then, add potting soil and plant your desired plants.
Safety Tips
- Work in a Well - Ventilated Area: Drilling metal can produce fumes and dust, so it's important to work in a well - ventilated area to avoid inhaling these particles.
- Keep Children and Pets Away: The drilling process can be dangerous, so make sure children and pets are kept away from the work area.
- Inspect Your Tools Regularly: Check your drill and drill bits for any signs of wear or damage before each use. Replace any worn or damaged parts immediately.
Conclusion
Drilling drainage holes in a metal flower pot is a relatively simple process if you follow the right steps and take the necessary safety precautions. By ensuring proper drainage, you can help your plants thrive and enjoy a beautiful, healthy garden.
If you're interested in purchasing high - quality metal flower pots for your gardening needs, we invite you to explore our extensive collection. We offer a variety of styles, sizes, and colors to suit every taste and budget. Contact us for more information or to start a procurement negotiation. Our team of experts is ready to assist you in finding the perfect metal flower pots for your project.


References
- "Gardening Basics: The Importance of Drainage in Plant Pots." Gardening Today Magazine.
- "Drilling Metal: Tips and Techniques." DIY Home Improvement Journal.